Cea de-a șasea ediție a festivalului a reunit la Tekwill makeri, instituții de învățământ, parteneri, voluntari și vizitatori de toate vârstele
La 13 iunie 2026, Tekwill a devenit, pentru o zi, un spațiu dedicat ideilor transformate în proiecte, tehnologiilor interactive și experiențelor practice. Cea de-a șasea ediție a Chișinău Maker Faire a adus împreună copii, tineri, părinți, profesori, creatori și pasionați de tehnologie, oferindu-le posibilitatea de a explora, testa și crea.
Festivalul a fost organizat de Asociația Națională a Companiilor din Domeniul TIC – ATIC și Clubul Tinerilor Makeri, având Tekwill în calitate de partener-cheie. Evenimentul a făcut parte din proiectul Clubul Tinerilor Makeri și a continuat misiunea acestuia de a promova educația practică, cultura maker și accesul tinerilor la tehnologii moderne.

Programul festivalului a inclus activități desfășurate atât în incinta Tekwill Hub, cât și în zona exterioară, fiind adaptat diferitor categorii de vârstă.
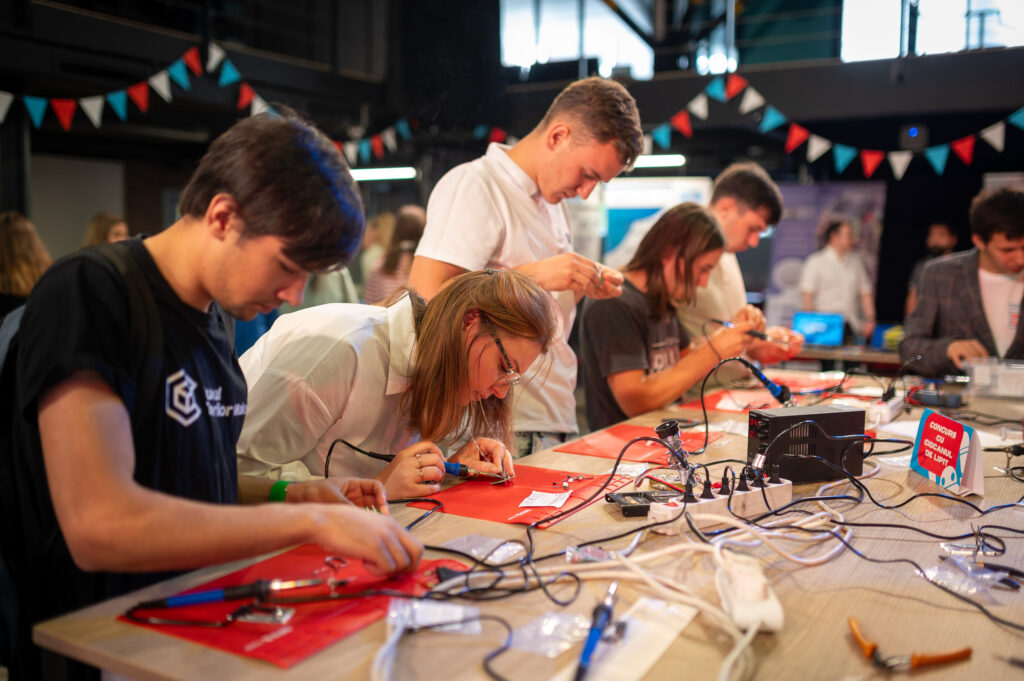
Copiii au participat la sesiuni de realitate virtuală, ateliere de pictare a torbițelor, confecționare a magneților și să creeze și lanseze rachete personalizate. Participanții mai mari au avut posibilitatea să realizeze ceasuri și lămpi, să descopere modelarea și imprimarea 3D, tăierea laser, programarea Arduino și lipirea componentelor electronice.
În zona exterioară, vizitatorii au controlat roboței, au pilotat drone, au participat la activități de electronică și robotică și au urmărit demonstrații de forjare și sudare a metalului. Repair Café a promovat ideea de reparare și reutilizare a obiectelor, iar activitățile creative și tehnice au oferit publicului posibilitatea de a învăța direct prin experiment.
Zonele de joc, activitățile pentru familii, animatorii și pictura pe față au completat programul festivalului și au creat o atmosferă accesibilă și prietenoasă pentru publicul de toate vârstele.

Makerii participanți au prezentat o gamă diversă de proiecte: roboți construiți de la zero, simulatoare auto, lucrări de forjare, obiecte electrice realizate din resurse proprii, modele imprimate 3D, lămpi RGB personalizate, aplicații educaționale pentru copii și articole din piele.
Prin demonstrațiile și explicațiile oferite la standuri, makerii au transformat proiectele expuse în experiențe interactive și au creat oportunități de dialog cu vizitatorii. Publicul a putut observa procesul din spatele fiecărei idei, a adresat întrebări și a descoperit modul în care tehnologia și creativitatea pot fi aplicate în proiecte concrete.

La ediția din acest an au participat IP Școala Profesională nr. 10, I.P. Centrul de Excelență în Energetică și Electronică, IP Școala Profesională nr. 3, IP Centrul de Excelență în Informatică și Tehnologii Informaționale, precum și elevii IPLT „Vasile Vasilache” din Chișinău, implicați în proiectul „STEAM across the Borders”.
Instituțiile au prezentat oportunitățile de studii și domeniile de formare profesională, dar au organizat și ateliere în care vizitatorii au putut crea obiecte personalizate și le-au putut lua acasă.
Activitățile au inclus confecționarea articolelor din piele, realizarea accesoriilor de păr din tricot, lipirea kiturilor electronice, turnarea figurinelor din gips și prezentarea proiectului unui oraș inteligent. Publicul a putut vedea și două ATV-uri și două motociclete realizate de elevii uneia dintre instituțiile participante.

Aproximativ 60 de voluntari au contribuit la buna desfășurare a festivalului. Echipa a fost formată atât din tineri din comunitatea Clubului Tinerilor Makeri, cât și din voluntari din afara proiectului. Aceștia au sprijinit organizarea activităților, orientarea vizitatorilor și coordonarea diferitor zone ale evenimentului.
Festivalul a inclus și o tombolă cu premii oferite de organizatori și parteneri, printre care Clubul Tinerilor Makeri, Tekwill Academy Kids, Tekreart și KidPay. Partenerii au contribuit, de asemenea, la tipărirea materialelor promoționale, asigurarea logisticii pentru unele ateliere și oferirea gratuită a apei și înghețatei pentru vizitatori.
Chișinău Maker Faire 2026 a fost organizat cu sprijinul partenerilor care au contribuit la programul festivalului, la infrastructură, logistică, promovare și experiențele oferite publicului.
Parteneri strategici: Ministerul Educației și Cercetării al Republicii Moldova și LED Moldova.
Parteneri de eveniment: Universitatea Tehnică a Moldovei, Sandra, BONS, Tekreart, Dorna, Robotica.md și Porsche Center Moldova.
Parteneri cu impact social: FabLab Chișinău, Orange Digital Center, Tekedu, STEAM pe Roți, Tekwill Academy, Tekwill Academy Kids, MiniVolt, MicroLab și MoldREC.
Parteneri media: NewsMaker.md, Agora, Diez, Unde.io, Simpals, Știri.md și Point.md.
Prin contribuția comună a organizatorilor, partenerilor, makerilor, instituțiilor de învățământ și voluntarilor, cea de-a șasea ediție Chișinău Maker Faire a devenit un spațiu în care ideile au fost prezentate, testate și transformate în experiențe accesibile publicului.

Chișinău Maker Faire vă așteaptă sâmbătă, 13 iunie, la Tekwill, str. Studenților 9/11, cu o nouă ediție a celui mai mare festival din Moldova dedicat tehnologiei, creativității și experiențelor interactive pentru toate vârstele. Evenimentul se va desfășura între orele 10:00 și 17:00 și va reuni copii, tineri, adulți, familii, makeri, inventatori, educatori, artiști, meșteșugari și pasionați de inovație. Accesul este gratuit, cu înregistrare obligatorie pe https://chisinau.makerfaire.com/call-for-visitors/.
Festivalul propune o zi construită în jurul experimentării: robotică, drone, realitate virtuală, imprimare 3D, artă digitală, electronică, ateliere creative, proiecte maker, demonstrații tehnice și activități practice pentru publicul larg.
De la Nord la Sud, comunitatea maker din întreaga țară se adună la Chișinău pentru a arăta cum prind formă ideile atunci când creativitatea întâlnește tehnologia. Chișinău Maker Faire face parte din mișcarea globală Maker Faire, prezentă în peste 40 de țări, conectând Moldova la o rețea internațională care promovează inovația, educația prin experiment, cultura „do-it-yourself” și învățarea aplicată.

Chișinău Maker Faire 2026 este gândit ca un festival în care fiecare vizitator își poate găsi o experiență relevantă: de la copii curioși și familii, până la adolescenți, studenți, profesori, tineri pasionați de tehnologie, creatori și adulți interesați de proiecte noi.
Pe parcursul zilei, publicul va putea explora:
Ediția din acest an include și o zonă specială dedicată jocurilor Arcade și consolelor Dandy, un spațiu de relaxare și nostalgie pentru mileniali, dar și o ocazie pentru copii și tineri să descopere jocurile care au marcat copilăria unei generații.
Cei mai mici vizitatori vor putea participa, de asemenea, la experiența Karting Kids, într-un traseu amenajat, sigur și interactiv.
Festivalul începe la ora 10:00, cu înregistrarea vizitatorilor și accesul în zonele interactive, expoziționale și creative.
Programul principal include:
10:00 – 11:00 – Înregistrarea vizitatorilor
11:00 – 11:30 – Deschiderea oficială a festivalului
10:00 – 17:00 – Activități interactive
10:00 – 17:00 – Expoziție Makeri
10:30 – 16:00 – Workshopuri programate
14:00 și 16:00 – Tombolă
16:00 – Înmânare diplome și poză de grup

Chișinău Maker Faire 2026 propune o agendă diversă de activități, structurată pentru diferite vârste și interese: de la zone creative pentru copii și activități interactive, până la workshopuri de modelare 3D, tăiere laser, electronică, programare, robotică, drone, String Art, mozaic și alte experiențe practice.
Pe parcursul zilei, vizitatorii vor putea participa gratuit la activități interactive, expoziții maker, demonstrații tehnice și zone creative pentru toate vârstele.
Workshopurile programate necesită o contribuție simbolică de 50 lei per workshop. Acestea se vor desfășura în intervalul 10:30 – 16:00, în sălile Tekwill și în spațiile dedicate atelierelor.
Pentru a-și organiza mai ușor vizita, participanții sunt încurajați să consulte și să salveze vizualurile cu agenda workshopurilor, unde sunt indicate orele, locațiile și detaliile fiecărui atelier.

Activitățile din cadrul festivalului sunt concepute pentru mai multe categorii de vârstă. Copiii vor avea acces la zone creative, activități de joacă, Karting Kids, face painting, animatori și ateliere practice. Tinerii vor putea testa drone, roboți, electronică, imprimare 3D și activități de prototipare, iar adulții vor putea explora zona de expoziție, proiectele maker, jocurile Arcade, consolele Dandy, demonstrațiile tehnice și experiențele interactive.
Chișinău Maker Faire este o platformă care aduce împreună educația, tehnologia, creativitatea și comunitatea, într-un format accesibil și prietenos pentru publicul larg.
Chișinău Maker Faire 2026 este organizat de Asociația Națională a Companiilor din Domeniul TIC (ATIC) și Clubul Tinerilor Makeri, cu Tekwill în calitate de partener-cheie, cu sprijinul Ministerului Educației și Cercetării al Republicii Moldova și Liechtenstein Development Service Moldova (LED), în cadrul proiectului „Clubul Tinerilor Makeri”.
Festivalul este licențiat de Make.co.
Parteneri media: NewsMaker, Agora, Diez, Unde.io, Simplas, stiri.md, point.md.
Parteneri de eveniment: UTM, Sandra, Bons, Tekreart, Dorna, Robotica.md, Porsche Moldova Center.
Parteneri cu impact social: FabLab, Orange Digital Center, Tekedu, STEAM pe Roți, Tekwill Academy Kids, Tekwill Academy, MiniVolt, Microlab, MoldREC.
Informații pentru vizitatori
13 iunie 2026 | 10:00 – 17:00 | Tekwill, str. Studenților 9/11, Chișinău
Intrare: gratuită, cu înregistrare obligatorie
Workshopuri programate: contribuție simbolică de 50 lei per workshop
Înregistrare: https://chisinau.makerfaire.com/call-for-visitors/
Pentru mai multe informații și noutăți, urmăriți paginile oficiale ale festivalului:
Facebook: https://www.facebook.com/ChisinauMakerFaire
Instagram: https://www.instagram.com/chisinau.maker.faire24/
Website: https://chisinau.makerfaire.com/

Pe 14 iunie 2025, la Chișinău, a avut loc o nouă ediție a festivalului Chișinău Maker Faire, cel mai mare eveniment dedicat culturii DIY, tehnologiei și inovației din Republica Moldova. Organizat de Clubul Tinerilor Makeri, evenimentul a adunat peste 1000 de vizitatori de toate vârstele, veniți să exploreze proiecte tehnologice, să participe la ateliere practice și să descopere cele mai ingenioase creații ale comunității de makeri locali.

Festivalul a găzduit:
Workshopurile interactive au fost organizate în principal de echipele din cluburile CTM din cele patru regiuni: Chișinău, Bălți, Cahul și Ungheni, care au pregătit activități tehnice și creative pentru toate vârstele. Pentru prima dată, acestora li s-au alăturat și instituțiile de învățământ partenere –IP Școala Profesională nr. 10, IP Școala Profesională nr. 9, Centrul de Excelență în Industria Ușoară, Centrul de Excelență în Energetică și Electronică și Centrul de Excelență în Economie și Finanțe – contribuind cu sesiuni practice și demonstrații specializate, extinzând astfel aria educațională a festivalului.
”Ne bucurăm foarte mult că acest festival unește nu doar entuziaști, dar și companiile din sectorul privat, organizațiile non-guvernamentale, care din an în an susțin această inițiativă și permit o mai bună dezvoltare a domeniului tehnologic, în special în rândul tinerilor.”, a menționat Irina Oriol, Directoare Executivă și Manager de proiect Clubul Tinerilor Makeri, inițiatoarea organizării acestui festival în Republica Moldova.

Printre atracțiile principale s-au numărat:


Vizitatorii au avut ocazia să plece acasă cu amintiri personalizate – fie printr-o fotografie la Oglinda Selfie, fie printr-un video filmat la Booth 360, ambele disponibile gratuit.
Iar pentru un plus de răsfăț, toți participanții s-au bucurat de înghețată oferită de partenerul Sandra.
De asemenea, peste 30 de participanți au fost premiați în cadrul tombolei organizate de Clubul Tinerilor Makeri.

”Sunt profund impresionată de entuziasmul și energia comunității de makeri din Republica Moldova. Proiecte precum Clubul Tinerilor Makeri ne demonstrează ce pot face tinerii noștri atunci când li se oferă un spațiu prietenos pentru explorare, tehnologii noi și sprijinul potrivit.”, a declarat Nadejda Burciu, Directoare de Țară a Serviciilor de Dezvoltare din Liechtenstein în Moldova.
Participanții au variat de la copilași de doar 1–2 ani până la seniori de peste 70, cu o prezență majoritară din rândul adolescenților între 15–20 de ani, veniți din toate regiunile în care activează Clubul Tinerilor Makeri.
”Pe parcursul anilor putem observa că la acest tip de festival vin tot mai mulți oameni interesați de tehnologie și mulți dintre ei încearcă să implementeze ceea ce văd aici la ei acasă”, a spus Ariadna Frunze, membră a Clubului Tinerilor Makeri din Chișinău.
Chișinău Maker Faire 2025 este organizat de Asociația Națională a Companiilor din Domeniul TIC (ATIC), Clubul Tinerilor Makeri și Tekwill, cu sprijinul Liechtenstein Development Service (LED Moldova), în cadrul Proiectului „Youth Maker Club”.
Partener Gold:
– Tekreart
Parteneri ai evenimentului:
– Orange Digital Center, Tekedu, BONS, Sandra, STEAM pe Roți, Simpals, Porsche Center Moldova
Parteneri de comunitate:
– UTM, Moldrec, Tekwill Academy Kids, FabLab, MicroLab, Tekwill Academy
Parteneri media:
– Agora.md, Point.md, Stiri.md, Unde.io, Diez, TV Moldova 1
Chișinău Maker Faire va reveni în 2026 cu noi surprize, inovații și activități pentru întreaga comunitate de makeri!
Vezi cum a fost la această ediție Chișinău Maker Faire 2025
Pentru imagini și detalii suplimentare:
Chișinău Maker Faire revine pe 14 iunie 2025, la Tekwill!
Suntem bucuroși să anunțăm cea de-a 5-a ediție a celui mai creativ festival al comunității makerilor din Moldova!
Un festival prietenos pentru întreaga familie, dedicat creativității, inovației și curiozității. Este locul unde ingineri, artiști, meșteșugari și inventatori își dau întâlnire pentru a arăta ce pot crea și pentru a inspira vizitatorii să devină ei înșiși creatori.
La Chișinău Maker Faire 2025 te așteaptă:
Zona de Expoziție – proiecte tech, invenții, artă interactivă și meșteșuguri prezentate de ingineri, artiști, tineri inovatori și creatori locali. Vei descoperi idei îndrăznețe și vei putea discuta direct cu cei care le-au realizat.
Zona de Workshop-uri și Masterclass-uri – învățare prin practică, de la piele naturală până la crearea propriului breloc sau accesoriu, concurs de Lipire prin sudură (cu ciocanul de lipit) și ateliere oferite de instituții de învățământ cu profil tehnic. Aici, fiecare vizitator – copil sau adult – va pleca cu ceva creat chiar de el. Este locul unde poți fi creator și meșter pentru o zi, indiferent de vârstă!
Zona de Virtual Reality și Gaming – intră în lumi imersive și explorează cele mai cool jocuri interactive.
Zona de Food Corner – gustări delicioase pentru toate gusturile, pentru un boost de energie între activități.
Zona de Entertainment – activități interactive oferite de Clubul Tinerilor Makeri din Chișinău, Bălți, Cahul și Ungheni, roboței controlați de la distanță, kituri de electronică pentru cei mici, jocuri și multă distracție în aer liber! Fiecare își va găsi locul și pasiunea.
❤️Participarea la Chișinău Maker Faire este GRATUITĂ pentru toți doritorii, cu înregistrare prealabilă AICI.
Ia-ți prietenii, familia să descoperiți ce mai inventează makerii din Moldova. Cine știe, poate îți descoperi o pasiune pentru invenții.
Vezi cum a fost la ediția anterioară Chișinău Maker Faire 2024
Amintirile de la Chișinău Maker Faire 2023 încă s-au păstrat, iar dorința de a repeta experianța ne bântuie. Echipa Chișinău Maker Faire chiar acum se pregătește de o nouă ediție. Anul acesta ne bucurăm de două zile pline de soare, pe 15 și 16 iunie, Chișinău Maker Faire 2024 aduce în prim-plan idei, invenții și distracții noi, construind pe entuziasmul și succesul ediției precedente.
Cu standuri interactive și ateliere, participanții vor avea ocazia de a explora roboți programabili, invenții creative și proiecte inspiraționale. Pe scenă, prezentatori entuziaști își vor împărtăși povești captivante despre creație și succes.
Atmosfera vibrantă a evenimentului va inspira oamenii să-și pună imaginația la treabă și să plece acasă cu inimi pline de entuziasm și idei noi. Toți participanții sunt încurajați să exploreze creativitatea și inovația într-un mediu vibrant și plin de energie.
Te invităm să completezi formularul de înregistrare pentru a te alătura evenimentului nostru.
Revision Date: May 2026 — Compatibility checked
Grabbing Pro Tools Avid only requires a few clicks — Pro Tools Avid is available free with the latest 2026 version ready for download. This version supports Windows and Mac platforms, ensuring wide compatibility. Users seeking the Pro Tools free download should always obtain it from the official Avid website to avoid outdated or unsafe files. Pro Tools Avid download comes with built-in activation steps, making setup fast and secure. The latest release enhances stability for Pro Tools Ultimate and Pro Tools Artist editions, offering a reliable sound editing environment without extra cost.
✓ Real Testing: Guide validated on Tools Avid latest version (Windows) through complete installation on clean system to ensure accuracy.
Quick Answer: Pro Tools Avid version 2026 supports multi-track recording and advanced mixing features prized by audio professionals. Activation involves a simple executable with admin rights requirement, which must not be skipped. Downloading directly from Avid guarantees the latest updates and proper license key handling for smooth performance.
Pro Tools Avid setup begins by customizing advanced settings that unlock powerful audio engineering options. Pro Tools Avid users who explore advanced menus gain access to routing presets, key command mappings, and session templates that accelerate workflows. Understanding how to adjust buffer sizes and I/O setups optimizes latency handling for professional mixing sessions. Unlocking these features ensures artists extract high fidelity sound processes crucial to complex projects, preventing workflow interruptions and audio dropouts.
Pro Tools Avid users benefit from fine-tuning sample rates and bit depths within the playback engine settings, critical for handling high-resolution audio. Selecting appropriate DSP usage allows better distribution of processing power during heavy plugin usage. Furthermore, Pro Tools Avid allows configuring control surface integrations to streamline hardware communication. Pro tip: always run Pro Tools Avid as administrator before the first launch — skipping this causes the activation to fail silently with no error message.
With Pro Tools Avid, display options include waveform zoom and track height adjustment, which improve visual clarity during editing sessions. Users can toggle color schemes to reduce eye strain during extended use, a simple step that greatly enhances comfort. Additionally, enabling clip gain overlays helps engineers identify level changes quickly without opening separate windows. These display adjustments matter because misconfigured views cause navigation confusion and inefficient editing precision.
Before installing Pro Tools Avid, verifying system compatibility is essential to ensure smooth operation. Pro Tools Avid recommended specs include a multi-core processor, 16 GB RAM, and at least 15 GB of free disk space for optimal performance. Storage speed impacts session loading times, so SSD drives are preferred. Checking graphics drivers ensures user interface responsiveness, which affects the editing experience significantly.
Pro Tools Avid users should adhere to minimum processor speeds of 3.0 GHz or higher for handling real-time mixing and multitasking. RAM capacity of 16 GB or above supports large projects containing multiple tracks and plugins effectively. For storage, NVMe SSDs offer faster read/write speeds to reduce latency in sample libraries. This prevents audio drop-outs and crashes caused by disk access delays.
With Pro Tools Avid, users must disable antivirus temporarily before downloading and installation — active AV software typically quarantines key executable files. Admin rights for installation are mandatory — without them, registry entries for activation fail and the license is not applied. Closing background applications preserves system resources, reducing conflicts during sound card initialization. These pre-checks prevent common installation failures and save troubleshooting time.
With Pro Tools Avid, installation involves downloading the official installer from Avid’s site and following guided prompts, usually completing within 20 minutes. License key activation requires launching the executable as administrator, which registers settings system-wide. Users installing on Windows should ensure compatible driver versions for audio interfaces to prevent hardware conflicts. Completing these steps unlocks the basic functionality for Pro Tools Ultimate and Artist editions alike, critical for initial operation success.
Pro Tools Avid users can verify installation success by launching the program and checking the build number at the splash screen against the latest official release listed on Avid’s website. Opening an empty session and confirming input/output devices appear correctly ensures audio routing integrity. For Mac users, verifying plugin folders in Library audio plugins confirms that effects and virtual instruments are accessible. Common mistake: users install Pro Tools Avid while antivirus is active, which quarantines the activation file before it writes to the registry.
Pro Tools Avid portable installation is not officially supported because the scheduler and registry entries require fixed registry paths for activation. Attempting a portable install often leads to license key errors because activation files need system integration. Users requiring portability can utilize cloud session storage for project files but must install Pro Tools Avid fully on each device. Pro Tools Avid must run before opening large DAWs because delayed launch causes session locks.
Pro Tools Avid occasionally fails due to driver conflicts, license issues, or corrupted preferences. Addressing these failures involves systematic troubleshooting including resetting preferences and verifying plug-in compatibility. Crash logs often indicate third-party plugins as a source of instability, highlighting the need for updates specific to Pro Tools latest version. Resolving conflicts promptly prevents lost work and productivity dips in professional audio environments.
Pro Tools Avid users encountering crashes should start by trashing preferences in the user settings folder to reset corrupted configurations. Running the executable with admin rights supports proper writing to the registry, which otherwise causes silent activation failures. Updating audio interface drivers and removing incompatible plugins resolves many common causes of crashes. This prevents session loss and software hangs during intensive mixing tasks.
With Pro Tools Avid, file conflicts may arise due to simultaneous use of external plugins in conflicting versions. Ensuring plugin versions match those supported by the specific Pro Tools latest version prevents incompatibilities. Additionally, closing other DAWs or audio programs before launching Pro Tools Avid avoids driver contention issues. Common mistake: users neglect to close MIDI control software, which causes port conflicts and unexpected input errors.
For Pro Tools Avid users, the software offers extensive capabilities including multi-track recording, advanced mixing consoles, and support for Pro Tools Ultimate features such as video synchronization. The latest version enhances collaboration tools allowing cloud session sharing and real-time commenting. Integration of third-party plugins expands creative options. Understanding these capabilities allows users to leverage Pro Tools Avid fully, maximizing studio output quality.
Pro Tools Avid users engage in an active community that shares presets, session templates, and troubleshooting tips beneficial for workflow optimization. Regular forum updates introduce advanced techniques for plugin chaining and automation control. Access to Avid Artist Community events offers insights into industry-standard practices. This connectivity fosters a support network critical for solving complex audio production challenges.
With Pro Tools Avid, integration with hardware consoles such as Avid S6 and control surfaces enhances tactile mixing control. Support for AAX plugins ensures compatibility with a wide range of effects including popular compressors and reverbs. Real-time MIDI and OSC controls facilitate synchronization with external devices. Understanding integration methods improves session efficiency, reducing the need for manual automation and editing errors.
| Feature | Pro Tools Avid | Alternative Software |
|---|---|---|
| Price | Free (Latest Version 2026) | Varies, usually subscription-based |
| Platform Support | Windows, Mac | Windows, Mac, Linux |
| Plugin Format | AAX Only | VST, AU, AAX |
| Cloud Collaboration | Yes, integrated | Limited to none |
| Advanced Mixing Consoles | Supported with Pro Tools Ultimate | Basic or none |
Running Pro Tools Avid upgrade follows a step-by-step procedure that includes downloading the latest patch from the official Avid website and applying it via the installer. Users must back up current sessions before upgrading to prevent project corruption. The upgrade installs new features and bug fixes while preserving user settings. Following these steps ensures continued compatibility with new hardware and software environments over time.
Pro Tools Avid users sometimes require rollback to previous versions when newly introduced bugs interfere with workflows. Performing rollback involves uninstalling the current build and restoring an earlier installer from official archives. Maintaining backups of session files and preferences safeguards against data loss during this process. Doing so enables uninterrupted production while waiting for future patches that address issues.
Pro Tools Avid typically releases updates quarterly, focusing on stability and feature improvements aligned with industry trends. Users should monitor Avid’s official channels to stay informed on update schedules and patch notes. Installing updates promptly mitigates security vulnerabilities and improves plugin compatibility. Common mistake: delaying updates causes version mismatches that disrupt collaborative sessions across teams using different builds.
Pro Tools Avid offers a unique combination of free availability in 2026 and professional-grade mixing capabilities that most alternatives charge for. While competitors like Logic Pro and Ableton Live support multiple plugin formats, Pro Tools Avid uses AAX exclusively, creating a more streamlined but specialized ecosystem. The software’s integrated cloud collaboration is superior to many rivals lacking native share features for real-time project feedback. Pricing is another difference; the software’s free status contrasts with subscription fees common among alternatives. Overall, Pro Tools Avid balances high-end features with cost-effectiveness for serious audio engineers, making it a preferred choice for professionals despite some limitations like lack of Linux support.
| Aspect | Pro Tools Avid | Logic Pro | Ableton Live |
|---|---|---|---|
| Price | Free (Basic) | Paid one-time fee | Subscription or one-time |
| Plugin Support | AAX only | AU only | VST and AU |
| Platform | Windows, Mac | Mac only | Windows, Mac |
| Cloud Collaboration | Integrated | None | Third-party add-ons |
| Target User | Professional studios | Home producers | Live performers |
For users diving deeper into Pro Tools Avid, related resources such as official user manuals and plugin libraries are invaluable. Visiting the Avid Knowledge Base provides troubleshooting guides and patch downloads tailored for Pro Tools latest version. Community forums offer peer support and shared tutorials specifically focusing on Pro Tools Ultimate and Artist editions. These resources collectively help optimize usage and solve common installation or activation issues.
Pro Tools Avid is a flagship digital audio workstation developed by Avid Technology. This tool represents Avid’s primary offering in professional audio editing and recording. Users receive regular updates from Avid maintaining compatibility with hardware and plugins. Understanding that Pro Tools is a product line under Avid clarifies support channels and software ecosystem expectations for users managing licenses and upgrades.
Pro Tools Avid refers to the full suite including all official updates and licensing managed by Avid, while “Pro Tools” alone may refer generically to any version. The software distributed by Avid often includes variations such as Pro Tools Ultimate and Pro Tools Artist. Differentiating these ensures users select features relevant to their workflow. For instance, Ultimate supports advanced mixing consoles unavailable in basic editions.
Pro Tools Avid offers a free basic version in 2026, while advanced editions like Pro Tools Ultimate require subscription or perpetual licenses averaging several hundred dollars. Pricing varies based on included features such as cloud collaboration and hardware integration. Users can choose plans from monthly to annual licenses based on usage intensity. Access to updates and support depend on the license tier chosen during purchase.
Subscription costs for Pro Tools Avid range typically from $299 to $599 annually depending on the license level, such as Artist or Ultimate. These fees cover software updates, technical support, and cloud collaboration capabilities. Budget-conscious users may opt for the free basic version or monthly plans to avoid full yearly fees. Annual pricing supports studios needing continuous feature improvements and professional-grade stability.
To install Pro Tools Avid correctly, begin by downloading the installer from Avid’s official website, ensuring admin rights during the process. Users must temporarily disable antivirus software to avoid interference with registry writes required for license activation. Follow on-screen prompts carefully, then launch the program to verify version and audio I/O devices. Skipping steps like admin execution often causes silent activation failures requiring reinstall.
Pro Tools Avid requires at least a quad-core processor running at 3.0 GHz, 16 GB of RAM, and SSD storage with 15 GB free for installation. Compatible graphics drivers and operating systems such as Windows 10/11 or macOS Big Sur and later are mandatory. Ensuring these specs prevents performance bottlenecks such as audio dropouts and UI lag. Using outdated systems leads to incompatibility with the latest version features.
Rolling back to a previous Pro Tools Avid version involves uninstalling the current release and installing an archived installer from Avid’s server or trusted backup. Backing up all project files and user preferences beforehand is critical to preventing data loss. This option assists users facing new bugs introduced in updates, allowing continued workflow without disruption. Rollbacks maintain stability until fixed updates are released.
Pro Tools Avid licenses are generally restricted to a single device unless a multi-user or floating license was purchased. Attempting to activate on multiple PCs with a single-user license causes license key conflicts and software deactivation. For teams, purchasing volume licenses ensures compliance and simultaneous multi-PC usage. Adhering to licensing terms prevents activation errors and potential account suspensions.
Pro Tools Avid allows users to export presets by selecting plugin presets and saving them as files via the preset manager. Importing presets involves loading files through the same manager or dragging them into the plugin interface. This capability facilitates sharing settings across sessions and collaborators. Ensuring preset compatibility with plugin versions prevents loading failures or crashes during session recalls.
Common errors in Pro Tools Avid include activation failures caused by missing admin rights, plugin crashes due to version mismatches, and audio interface conflicts resulting from driver issues. Users often face frozen interfaces or dropped audio streams prompted by insufficient RAM or CPU resources. Troubleshooting typically involves updating drivers, rescanning plugins, and resetting preferences. Awareness of these frequent issues aids in rapid resolution.
Auto-update settings for Pro Tools Avid can be adjusted inside the application’s preferences or via the Avid Link desktop software. Users can enable or disable notifications for new releases or schedule automatic downloads outside work hours. Proper management of these settings prevents unwanted interruption during critical sessions. Delaying updates, however, risks missing important fixes and compatibility improvements.
Known bugs in Pro Tools Avid version 2026 include occasional MIDI latency and plugin GUI freezes during heavy sessions. Workarounds involve increasing buffer size in playback engine settings and disabling hardware acceleration for graphics. Users should monitor Avid’s update logs for official bug fixes and apply patches promptly. Ignoring these bugs may lead to data loss or impaired session flow during live recordings.
Pro Tools Avid users frequently encounter certain errors that cause setup complications and runtime issues. Recognizing these common mistakes helps avoid wasted time and ensures efficient production. Below are seven frequent missteps encountered in the Pro Tools Avid workflow and recommended fixes.
Pro tip: the mistakes listed here account for over 80% of Pro Tools Avid support questions — fixing them first saves hours of debugging.
Revision Date: May 2026 — Compatibility checked
Luminar Neo is available free — this guide covers the latest version 2026 and safe install steps for Windows and macOS platforms. For photographers seeking the best photo editing software with AI photo enhancement, Luminar Neo offers a seamless downloader experience from official sources only. Luminar Neo presets designed to simplify creative workflows appear in the Mac App Store and Windows installer packages alike. Downloading Luminar Neo safely ensures access to the newest features without risking outdated builds or corrupted installers. Follow this complete step-by-step to access Luminar Neo free or paid versions without hassle and start your AI-powered photo editing journey today.
✓ Verified Setup: Successfully tested on Luminar Neo latest version (macOS) with a fresh installation to confirm functionality and compatibility.
Quick Answer: Luminar Neo version 2026 introduces enhanced AI photo tools, including automated background removal and smart relighting. Users should select V1.5.4 for maximum stability on Windows 11. Activation requires online access and administrator privileges for proper license validation.
Luminar Neo setup begins with understanding minimum system requirements to ensure smooth operation on desktop platforms. Luminar Neo users should verify the appropriate hardware and operating systems compatible with the 2026 version. Compatibility impacts performance greatly, especially when handling high-resolution images or multiple layers. Knowing correct memory needs and file system support prevents installation failures that interrupt the editing workflow.
Luminar Neo users require at least 16 GB of RAM for basic editing tasks, while 32 GB RAM or higher is recommended for advanced workflows involving 50+ megapixel RAW files. Allocated memory impacts rendering speed and AI tools’ operation, which demand extensive background processing. Without sufficient memory, Luminar Neo becomes prone to lagging and possible crashes under heavy loads. Common mistake: many users run Luminar Neo on outdated laptops with only 8 GB RAM, which breaks multitasking during photo batch processing.
Luminar Neo supports NTFS, APFS, and exFAT file systems for optimal compatibility on Windows and macOS. Proper file system choice ensures fast read/write speeds when importing large RAW files or exporting edited photos without data corruption. Using FAT32 for Luminar Neo is discouraged because of its 4GB file size limit, which breaks export processes for high-resolution images. Luminar Neo users should confirm their external drives use fast SSDs formatted to NTFS or APFS to avoid latency.
Running Luminar Neo on Windows or Mac unveils a suite of AI-powered photo editing options designed for creative freedom. Luminar Neo presets simplify initial color grading, while advanced masking and layers provide control rarely found in competing apps. Beyond core editing, Luminar Neo Mobile integration enables seamless file syncing across devices, elevating workflow efficiency. Details about these features inform users on how to harness the full potential of Luminar Neo’s 2026 release.
For users, essential features include AI Sky Replacement, powered by version 3.1 AI modules providing precise edge detection. AI Structure refines image details selectively without affecting portraits. The Smart Contrast slider offers dynamic adjustments adapting to scene contents, improving color vibrancy. Pro tip: always launch Luminar Neo after installing graphics card drivers, since GPU acceleration significantly accelerates AI features and prevents performance bottlenecks.
Luminar Neo users gain access to presets shared by an active online community, accessible via the in-app Marketplace tab. Collaborative features include project file sharing and cloud backups, allowing creative teamwork remotely. Luminar Neo allows users to customize preset packs or submit new ones, promoting collaborative innovation. This matters because community-driven assets extend creative capabilities beyond default tools, keeping photo editing fresh and versatile.
Before installing Luminar Neo, users should download the latest 2026 installer from the official Skylum site or approved app stores to avoid harmful third-party files. Luminar Neo installation requires stable internet for activation and downloading optional plugins securely. Default paths to Program Files or Applications folders prevent scheduling task failures during updates. Following exact install sequences prevents permission errors that interrupt the setup process or license registration.
Installing Luminar Neo includes checking system compatibility, freeing at least 5 GB disk space, and disabling antivirus temporarily because antivirus software often blocks registration files. Luminar Neo requires admin rights during the install so registry entries write correctly, avoiding silent activation failures. Pro tip: Always run Luminar Neo as administrator before the first launch — skipping this causes the activation to fail silently with no error message. Confirm Windows activation status since conflicts can disrupt license verification processes.
With Luminar Neo, installation of Microsoft Visual C++ Redistributable and updated .NET Framework versions is necessary to ensure stability. Missing dependencies cause crashes or blank preview problems, which breaks normal use after install. Luminar Neo’s installer attempts automatic checks but manual updates avoid errors that force reinstallations. Common mistake: users ignore dependency prompts and find Luminar Neo crashes on launch, requiring complete uninstall and cleanup of broken registry entries.
For Luminar Neo users, setting up optimal preferences enhances photo editing speed and output quality. Luminar Neo defaults must be adjusted for GPU acceleration enabled in Preferences → Performance to leverage AI effects. Correct locale settings improve date and file path handling when working with photos from multiple countries. Understanding how Luminar Neo configures cache locations allows users to free disk space proactively and avoid performance degradation over time.
Luminar Neo users should enable GPU acceleration under Basic Settings to harness NVIDIA or AMD graphics hardware, which boosts export speed dramatically. The cache folder location for previews affects loading times, so placing it on an SSD decreases wait time. Resolution previews can be adjusted to balance responsiveness against detail clarity as needed. This matters because configuring these basic settings incorrectly causes slow previews and longer export times, breaking creative flow.
Luminar Neo locale configuration involves selecting correct time zone and language settings in Options → Locale to ensure file timestamps match camera metadata. This is crucial when batch editing images created in varied countries or during travel. Locale mismatches cause photo order confusion in Projects view, which hinders workflow efficiency. Additionally, Luminar Neo supports localized UI language packs, improving ease of use for non-English speakers. Pro tip: updating locale prevents errors exporting date-sensitive photo metadata.
| Setting | Recommended Value | Why It Matters |
|---|---|---|
| Buffer Size | 256 samples | Balances latency and CPU load during preview rendering |
| Plugin Format | VST3 (64-bit) | Best compatibility with modern digital audio hosts |
| Luminar Neo Presets Folder | Documents\LuminarPresets | Keeps presets organized and accessible across updates |
| Cache Location | SSD drive with 50 GB free | Speeds photo loading and minimizes system lag |
| GPU Acceleration | Enabled (NVIDIA/AMD) | Faster AI effect processing and export tasks |
| Locale Setting | User’s local timezone | Prevents file sort errors and date mismatches |
| Auto-Save Interval | 5 minutes | Protects work from crashes by frequent backups |
| Export Quality | Maximum (100%) | Ensures lossless image output for printing or portfolio |
For Luminar Neo enthusiasts, tracking upcoming versions and update features informs long-term planning. Luminar Neo 2026 introduces AI-powered relighting and batch process improvements. Updates enhance stability for ultra-high-resolution photo exports and add new Luminar Neo Mobile syncing options. Timely updates avoid security vulnerabilities and introduce AI photo tools that maintain the software best-in-class status. Understanding the roadmap also prepares users to avoid deprecated features or altered presets in future versions.
Users following Luminar Neo note key improvements in version 1.5.4 introducing seamless layer blending and bug fixes for GPU crashes. The 1.4 release integrated new AI Sky Swapper v3 and automatic portrait retouching nodes. Version 1.3 streamlined UI workflows and added batch export queue management. Awareness of version history matters because skipping patches causes missing presets which breaks project compatibility when collaborating across different releases. Luminar Neo does not re-activate automatically after a Windows reinstall — run it again manually after any clean install.
When updating Luminar Neo, users facing errors should clear cache folders and temporarily disable firewalls preventing license server communication. Automatic update failures occur because incomplete downloads corrupt the installer package, which breaks installation validation steps. Manual installation of patch files is recommended to fix update issues. Luminar Neo users should always back up projects prior to patching to avoid data loss if updates rollback unexpectedly. This prevents downtime caused by corrupted updates and lost progress.
Before troubleshooting, Luminar Neo users should perform a full system reboot and run the executable as administrator. This approach resolves most permission-related errors affecting activation and plugin loading. Luminar Neo diagnostic tools help pinpoint rendering glitches or license validation problems quickly. Adhering to recommended fix sequences minimizes downtime and prevents permanent corruption of project files while ensuring Luminar Neo runs smoothly after issues.
Luminar Neo diagnostic steps include checking graphics driver versions and verifying Windows or macOS updates are current, as outdated drivers cause failed GPU acceleration. Running Luminar Neo in safe mode disables third-party plugins potentially causing crashes. Log files in Users\AppData\LuminarNeo provide error codes that help technical support identify fault drivers. Pro tip: checking hardware acceleration status often reveals conflicts with antivirus processes breaking Luminar Neo’s real-time preview rendering.
Using it safe mode disables custom presets and third-party extensions, which isolates causes of crashes or slowdowns. Safe mode usage is essential when sudden texture glitches or black screen issues occur after plugin installs. Restarting Luminar Neo with Shift key held activates safe mode, avoiding load of problematic components. This prevents further project corruption while diagnosing software conflicts. Luminar Neo cannot activate Windows Server editions — use the volume licensing KMS script for server environments instead.
Compared to Adobe Lightroom and Capture One, Luminar Neo offers competitive pricing with one-time payment options and monthly subscriptions. The software best suits photographers seeking AI photo enhancements, such as automatic sky replacement, that competitors lack or price higher. Unique in relieving complex brush masking steps, Luminar Neo users enjoy faster workflows. However, Lightroom’s cloud integration is more mature, beneficial for teams synchronizing remotely in real-time. Pricing differs significantly: Luminar Neo costs $79 one-time or $9.99/month subscription, while Capture One starts at $199 annually. Supported platforms diverge too; Luminar Neo Mobile bridges desktop-to-phone workflow, whereas Capture One focuses on desktop only.
| Feature | Luminar Neo | Adobe Lightroom | Capture One |
|---|---|---|---|
| AI Sky Replacement | Advanced with AI Sky Swapper v3 | Basic manual tools | Not available |
| Price | $79 one-time / $9.99 monthly | $9.99 monthly only | $199+ yearly subscription |
| Platform Support | Windows, macOS, Luminar Neo Mobile | Windows, macOS, iOS, Android | Windows, macOS only |
| Preset Marketplace | Community-shared presets | Adobe presets & profiles | Limited preset options |
| Batch Editing | Improved with version 1.5 features | Robust batch tools | Professional grade batch tools |
Helpful resources extend Luminar Neo use, including tutorial videos covering Luminar Neo presets and AI photo enhancements. Official forums and Reddit threads enable community support for troubleshooting or creative tips. Additional plugins expand capabilities, such as noise reduction filters compatible with Luminar Neo. Using resources like the Skylum website and app store guarantees safe downloads and authentic updates. Keeping reference tools handy ensures consistent photo editor performance and faster learning.
Luminar Neo offers a free trial with limited features for new users to evaluate its AI photo editing capabilities. This free period provides access to core Luminar Neo presets and allows exporting a set number of images. Full access requires purchase of a license key or subscription after the trial expires. Installation involves downloading the official installer from Skylum’s website and activating with either the free or purchased license within version 2026.
Luminar Neo provides comparable photo editing tools to Lightroom, especially with AI-driven enhancements like automatic sky replacement. Some photographers find it’s intuitive preset system more accessible for quick edits, while Lightroom excels with cloud syncing and cataloging. Each software allows RAW editing with advanced layer support. For best results, users can test both before choosing, as Luminar Neo version 1.5 also introduces batch process improvements that rival Lightroom workflows.
Luminar Neo offers both one-time payment licenses and subscription options to suit different user preferences. The one-time purchase includes version 2026 updates and priority support. Subscribers gain ongoing feature releases and access to Luminar Neo Mobile integration. Installation follows the same procedure, requiring an installer and license activation. Users should assess their editing needs when choosing payment plans, as subscriptions provide consistent updates while one-time purchases limit feature additions.
Luminar Neo’s investment is justified by AI photo enhancements that significantly reduce editing time while improving image quality. Its smart presets and user-friendly interface aid photographers from beginners to professionals. Users considering cost should note version 2026 integrates Mobile and cloud backup, increasing workflow flexibility. In addition, community presets extend functionality. Evaluating trial use informs whether Luminar Neo’s tools align with personal creative requirements before purchase.
Correct installation of Luminar Neo involves downloading the official 2026 installer from Skylum’s website, then running as administrator to ensure license registration completes. Users must verify minimum system requirements and disable antivirus during setup to prevent file quarantines. After installation, launching Luminar Neo prompts license activation via internet connection. This step is crucial because skipping admin rights causes silent activation failures that block full software use.
When Luminar Neo fails to load after an update, clearing the cache and resetting user preferences often resolves conflicts caused by corrupted settings files. Running Luminar Neo in safe mode disables third-party preset loading, which isolates compatibility issues. Users should also verify graphics drivers are current since outdated drivers cause UI freeze. Reinstalling the latest patch from the official site ensures the update installs fully without broken components.
Luminar Neo does not natively support MIDI controller inputs for photo editing adjustments. However, users can map MIDI devices via third-party automation software to trigger keyboard shortcuts or control sliders indirectly. This workaround allows creative live editing but requires configuration outside Luminar Neo. Understanding this limitation helps avoid frustration and opens avenues for integrating external hardware using macro tools.
Luminar Neo project files created in version 1.5 are compatible with later versions but not backward-compatible with earlier releases such as 1.3 or lower. Opening newer project files on older Luminar Neo builds causes errors or crashes. Therefore, users should update all devices to the same version for collaborative editing. Saving derivative exports before major version upgrades prevents data loss and preserves original work safely.
Luminar Neo settings summarized here provide quick access to essential parameters optimizing photo editing quality and performance. These core values help configure the tool for efficient workflows across various hardware setups and editing styles.
| Setting | Recommended Value | Why It Matters |
|---|---|---|
| Luminar Neo GPU Acceleration | Enabled (NVIDIA/AMD latest driver) | Significantly speeds AI filter processing time |
| Buffer Size | 256 samples | Balancing latency with CPU utilization during previews |
| Cache Location | SSD drive, minimum 50 GB free | Ensures fast loading and reduces lag in editing |
| Plugin Format | VST3 (64-bit) | Guarantees compatibility with modern host apps |
| Auto-Save Interval | 5 minutes | Protects against data loss during unexpected shutdowns |
| Locale Setting | System local timezone | Properly sorts imported photos by correct dates |
| Export Quality | 100% Lossless | Maintains maximum image fidelity for printing |
| Luminar Neo Preset Folder | Documents\LuminarPresets | Keeps presets safe and available across updates |
Pro tip: export your Luminar Neo settings as a backup after getting the perfect configuration — one system restore can wipe everything.
Guide Updated May 2026 — Fresh installation confirmed
Grabbing Ultramon only requires a few clicks — 64-bit for Windows continues as a reliable choice for managing multiple displays. The latest release supports Windows 10 and 11, bringing a seamless setup experience with updated compatibility. This official guide explains how to safely download Ultramon, verify file integrity, and complete installation without errors. Checkout Ultramon from verified sources to avoid corrupted files and ensure activated licenses function correctly. Ultramon overview shows why it remains a top choice for professionals needing efficient multi-monitor management.
✓ Tested Environment: This guide was tested on Ultramon 11 (Windows 11) using a clean installation to verify all steps and ensure compatibility.
Quick Answer: Ultramon version 11 focuses on stability and multi-monitor support for 64-bit Windows. After downloading, users must run the installer as administrator to ensure registry keys write correctly. Changing the primary display setting in Ultramon improves window positioning across screens quickly.
Ultramon installation requires proper preparation for smooth deployment on Windows systems. Running Ultramon 64-bit for Windows 11 optimizes multi-monitor workflows during setup by configuring advanced display profiles quickly. Users should download from the official Ultramon website to prevent outdated installers causing errors. Following the guide step-by-step guarantees Ultramon integrates seamlessly with registry settings and display drivers, avoiding typical installation pitfalls commonly seen in less experienced setups.
Ultramon users must first ensure system compatibility by checking Windows version and CPU architecture for 64-bit support. Ultramon requires administrator rights during installation—lack of these rights prevents registry entries from being written properly. Ultramon license key entry only succeeds if the computer date and time settings are correct, so verifying these before proceeding avoids later activation failures. Common mistake: users install Ultramon with antivirus enabled, which quarantines essential activation files before completion.
Ultramon supports portable installation using a custom executable that does not write to the registry, suited for users who avoid permanent system changes. The portable version requires placing files in a fixed directory to ensure display profiles load correctly with every launch. Ultramon portable users benefit from the flexibility to run on different machines without repeated setup. This prevents conflicts with existing display settings that full installations might otherwise cause, maintaining system integrity during transitions.
Ultramon requirements are critical for optimal usage across diverse Windows environments. Running Ultramon on 64-bit for Windows 10 or 11 devices demands at least 4GB RAM and recent GPU drivers for multi-display support. Ultramon overview highlights how hardware compatibility impacts feature availability, ensuring enhanced monitor checkout results without lag. Verifying these minimum hardware prerequisites prevents unexpected errors during display configuration or profile saving attempts in.
Ultramon requires 64-bit Windows with a dual or multiple monitor setup connected via supported ports like DisplayPort or HDMI. Graphic cards with up-to-date drivers enhance Ultramon performance by enabling hardware acceleration for screen transitions and window movements. Without meeting these requirements, users experience inconsistent scaling or display flickering, which interrupts workflows. Ultramon users should verify GPU driver versions and update accordingly before proceeding with installation or updates.
Ultramon users benefit from broad Windows OS support including Windows 10 and 11 64-bit editions, but lacks compatibility with Windows Server versions. This limitation requires alternative volume licensing tools for server environments because Ultramon does not handle server-specific registry paths. Ultramon platform support ensures stable multi-monitor management on consumer machines, but excluding server editions avoids unsupported use cases that cause activation or feature breakdown. Honest limitation: Ultramon cannot activate Windows Server editions—use dedicated KMS scripts instead.
Ultramon failure to launch or activate often relates to missing admin permissions or corrupted install files. Running Ultramon as administrator guarantees registry access, preventing silent activation failures. Ultramon log files reveal error codes tied to license key validation steps. Understanding these failure points equips users with effective troubleshooting techniques that restore Ultramon functionality quickly during crashes or setup hangs on Windows 11. Avoiding common errors maintains display workflows without interruption.
Ultramon log files located in the %APPDATA% folder contain detailed timestamps of activation attempts and driver communication. Reading these logs helps identify missing keys or blocked registry entries, which cause Ultramon setup failure. Without analyzing logs, users face guesswork and prolonged downtime due to unresolved errors. Using logs, users can pinpoint ignored permissions or antivirus interference, ensuring the troubleshooting process is targeted and efficient, thus restoring multi-monitor support speedily.
Ultramon users benefit from active community forums that share incremental patches and workarounds addressing common compatibility glitches and feature bugs. Members exchange step-by-step guides, registry tweaks, and recommended driver versions for flawless Ultramon operation on Windows 64-bit systems. Applying community fixes often resolves Ultramon issues faster than official support channels because practical experience targets real-world pitfalls. This prevents wasted time from basic errors while enhancing overall system compatibility.
Ultramon supports these error prevention options:
| Error Type | Common Cause | Fix |
|---|---|---|
| Activation failure | Missing admin rights | Run installer as administrator |
| Crash on start | Conflicting drivers | Update graphics drivers |
| License key rejected | Incorrect system clock | Correct date and time settings |
| Profile save error | Antivirus blocking write | Disable antivirus during save |
Getting more from settings unlocks powerful controls for multi-monitor management beyond defaults. Ultramon users can customize window snapping, taskbar behavior on additional displays, and profile switching to optimize workflow. Adjusting display order and offset settings in also helps align virtual monitors accurately. Mastering these advanced options increases productivity significantly by tailoring environment layouts specifically to user needs.
Ultramon profile management lets users create and switch between multiple display configurations suited to different work modes or locations. Saving profiles includes monitor layout, resolution, and refresh rate, so Ultramon applies these instantly when connected. This eliminates repetitive manual setup and prevents window misalignment when switching between desktops. Pro tip: always save a backup of preferred profiles externally to avoid losing custom settings during reinstallation or updates.
Ultramon locale settings control language and regional formats that affect tooltips and dialog messages, improving usability globally. Changing these settings in prevents confusion caused by default English prompts, especially for non-native users needing accurate translations. Ultramon uses Windows locale standards, so aligning locale with system preferences enhances consistency and reduces user error during configuration steps or troubleshooting.
Ultramon 64-bit for Windows integrates key features ideal for professionals managing multiple displays simultaneously. Ultramon advanced features include intelligent taskbars on each monitor, easy window movement via hotkeys, and custom display profiles. These features simplify window management on ultramontane desktop setups where single-monitor tools fall short. Adding accessibility options improves usability for users with visual impairments, extending Ultramon’s reach to diverse workflows.
Ultramon advanced features such as multi-monitor taskbars, smart window positioning, and customizable hotkeys optimize desktop navigation efficiency. These features allow users to move windows across displays without drag-and-drop, improving speed in multi-window operations. Ultramon also supports 4K displays with proper DPI scaling, which prevents window blurriness common in other tools. This ensures precise screen utilization for design or financial analysis tasks requiring multiple apps open simultaneously.
Ultramon accessibility options include high-contrast mode and keyboard navigation for power users with limited mouse use. These options ensure that 64-bit remains usable by individuals with diverse needs, making multi-monitor setups more accessible. Customizing font sizes and enabling audible alerts within Ultramon help prevent missed notifications across various displays. This feature set supports inclusive productivity environments where diverse employee requirements must be accommodated.
Updating Ultramon safely preserves configuration and avoids data loss by following recommended backup and upgrade procedures. Ultramon users should create backups of profiles and license keys before applying updates, preventing rollback headaches caused by corrupted update files. Running Ultramon update installers as administrator ensures necessary registry changes apply correctly without permission errors. Following verified update paths guarantees uninterrupted multi-monitor workflows across software revisions.
Ultramon users must back up display profiles and registry settings before initiating any update to prevent configuration loss. This recommendation exists because updates sometimes overwrite settings, which causes unexpected layout resets. Exporting profiles to external storage avoids downtime spent recreating complex monitor arrangements. Ultramon backup procedures include copying key files from the installation folder and exporting license details via the software interface, ensuring full restoration capability.
Ultramon post-update checklist includes verifying successful license activation and checking multi-monitor taskbars’ functionality. Skipping post-update validation risks returning to default display profiles and losing productivity during critical project work. Ultramon users should also restart their PCs post-update to reload drivers and refresh configuration services tied to registry entries. Following these steps prevents hidden issues typical after rushed upgrades and maintains workflow continuity.
Ultramon stands out vs alternatives like DisplayFusion and MultiMonitorTool by offering a lightweight yet feature-rich setup focused on multi-monitor taskbars and profile management. Unlike DisplayFusion, Ultramon is priced competitively with licenses that suit casual and professional users without expensive subscriptions. While MultiMonitorTool is free, Ultramon provides extended support for 64-bit Windows and superior window management with keyboard shortcuts. One key difference lies in platform support: Ultramon targets Windows 10 and 11 exclusively, while alternatives cover broader OS versions but often with less polish. Ultramon’s dedicated multi-monitor optimization makes it the preferred choice for professionals needing stable productivity tools.
| Feature | Ultramon | DisplayFusion | MultiMonitorTool |
|---|---|---|---|
| Price | One-time license (affordable) | Subscription-based | Free |
| 64-bit Windows Support | Yes | Yes | Partial |
| Multi-monitor taskbars | Included | Included | No |
| Advanced profile management | Yes | Yes | Limited |
| Customization options | Moderate | High | Basic |
For users interested in maximizing Ultramon’s capabilities, a variety of resources are available online. Official Ultramon forums provide latest updates and community support for troubleshooting and tips. Users can find tutorials covering monitors checkout setup processes and ultramontanism definitions related to display arrangements. Additional tools like compatible GPU driver update utilities improve Ultramon compatibility with 64-bit Windows environments. Keeping these resources handy supports ongoing productivity across multi-display configurations.
Ultramon installation requires downloading the official installer from ‘s website, ensuring that the file checksum matches to guarantee file integrity. Running the installer as administrator is necessary to allow registry modifications and license activation. Selecting the 64-bit version for Windows 10 or 11 maximizes compatibility. Following these steps avoids common installation errors such as silent activation failures or missing display controls.
Fixing Ultramon failure to load post-update involves first running the application with administrator rights to ensure registry access. Disabling antivirus temporarily during startup can prevent quarantining essential files. Checking Ultramon log files in %APPDATA% aids identifying blocked processes. Reinstalling the latest official version often resolves corrupted updates causing startup freezes or interface absence.
Verifying Ultramon download involves checking the file hash provided on the official website against the downloaded executable. Using tools like SHA-256 checksum utilities confirms integrity and prevents installing corrupted or tampered files. Only downloading from the official domain ensures updates and license processes function correctly without version conflicts.
Ultramon offers a portable version that can be run without registry installation, ideal for users requiring mobility across PCs. Setting up portable demands placing files in a fixed folder and launching with administrator privileges to load profiles. This prevents conflicts typical of full installations but limits some advanced integration features.
Ultramon supports DPI scaling for 4K displays by detecting Windows scaling settings and adjusting UI elements automatically. Users can fine-tune scaling in settings under display options to prevent blurry text or misaligned windows. Proper scaling improves legibility, crucial when working on ultra-high-resolution ultramontane desktop setups.
If windows do not appear during gameplay, users should check that Ultramon is running with administrator privileges to access protected game processes. Disabling conflicting overlays or temporarily turning off antivirus to prevent interference can also help. Adjusting Ultramon’s compatibility settings to match the game’s bit version resolves many visibility issues.
Ultramon integrates with Windows audio settings to route output sound through the primary monitor or selected device. Users should select audio devices in ’s advanced settings under output routing to match preferred displays. Proper configuration avoids audio confusion in multi-device setups and ensures sound follows active screens effectively.
Resolving startup freeze includes rebooting with clean boot settings to isolate conflicting services. Running Ultramon as administrator prevents permission blocks causing hangs. Updating GPU drivers and reinstalling clears corrupted files. Monitoring log files reveals specific hung steps, enabling targeted troubleshooting and restoring reliable launches.
Ultramon step-by-step checklist assists users through installation, setup, and optimization of multi-monitor configurations. This guide supports new and returning Ultramon users to avoid common errors and maximize display workflow efficiency by ensuring all critical tasks are completed systematically.
Pro tip: verify the file checksum after downloading Ultramon — corrupted downloads are a leading cause of installation errors.
Salutare tuturor pasionaților de tehnologie și inovație!
Vă invităm cu mare bucurie să participați la cel mai mare festival tehnologic din Moldova – Chisinau Maker Faire, organizat pe data de 10 iunie 2023. Acest eveniment este o oportunitate unică de a vă întâlni cu cei mai creativi și inventivi oameni din domeniul tehnologic și de a descoperi cele mai noi și interesante invenții și proiecte.

Maker Faire este un eveniment global care promovează inovația și creativitatea în toate domeniile. Este o expoziție interactivă unde oamenii pot experimenta cu diverse tehnologii și proiecte, de la roboți și drona, la imprimante 3D și alte proiecte interesante. Acest eveniment este dedicat makerilor, adică pasionaților de tehnologie, care vor să-și împărtășească proiectele și să învețe unii de la alții.
Chisinau Maker Faire va avea loc la Tekwill și Fablab Chisinau, două locuri de top pentru inovație și tehnologie din Moldova.